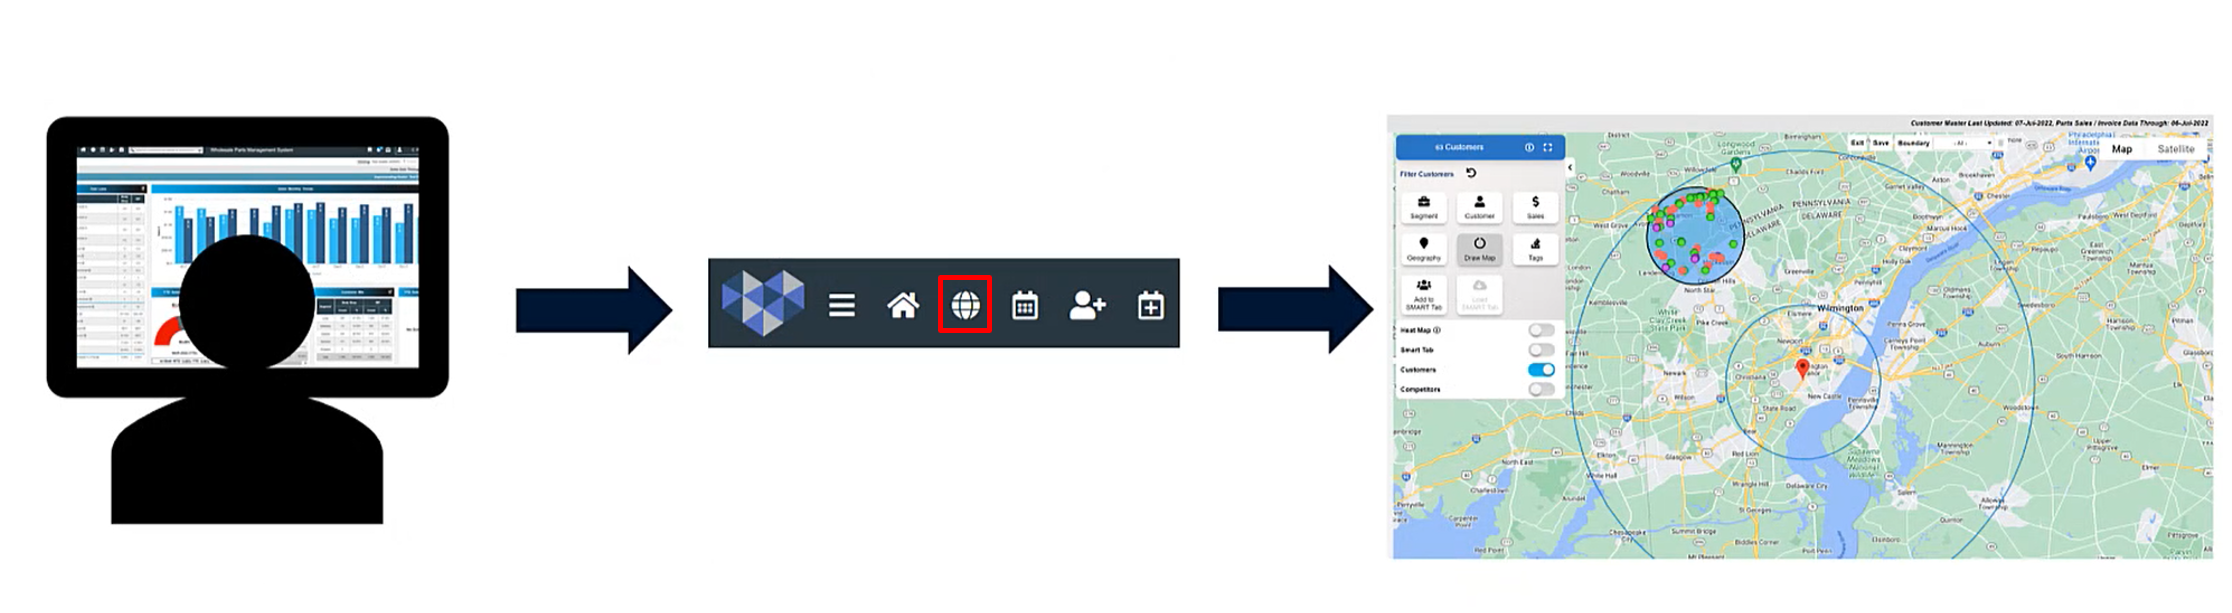
The Boundaries feature is a great tool to use when it comes to zeroing in on specific customers in a given area, as well as creating lists and planning routes for your dealership’s outside sales reps. To access the SMART Maps feature, utilize the menu bar located at the top of your screen and click the globe icon. Also, you can reach the SMART Maps page by visiting “Manage Customers” where you will find this same icon within the three dot menu beside any desired customer.
Draw Map Filter
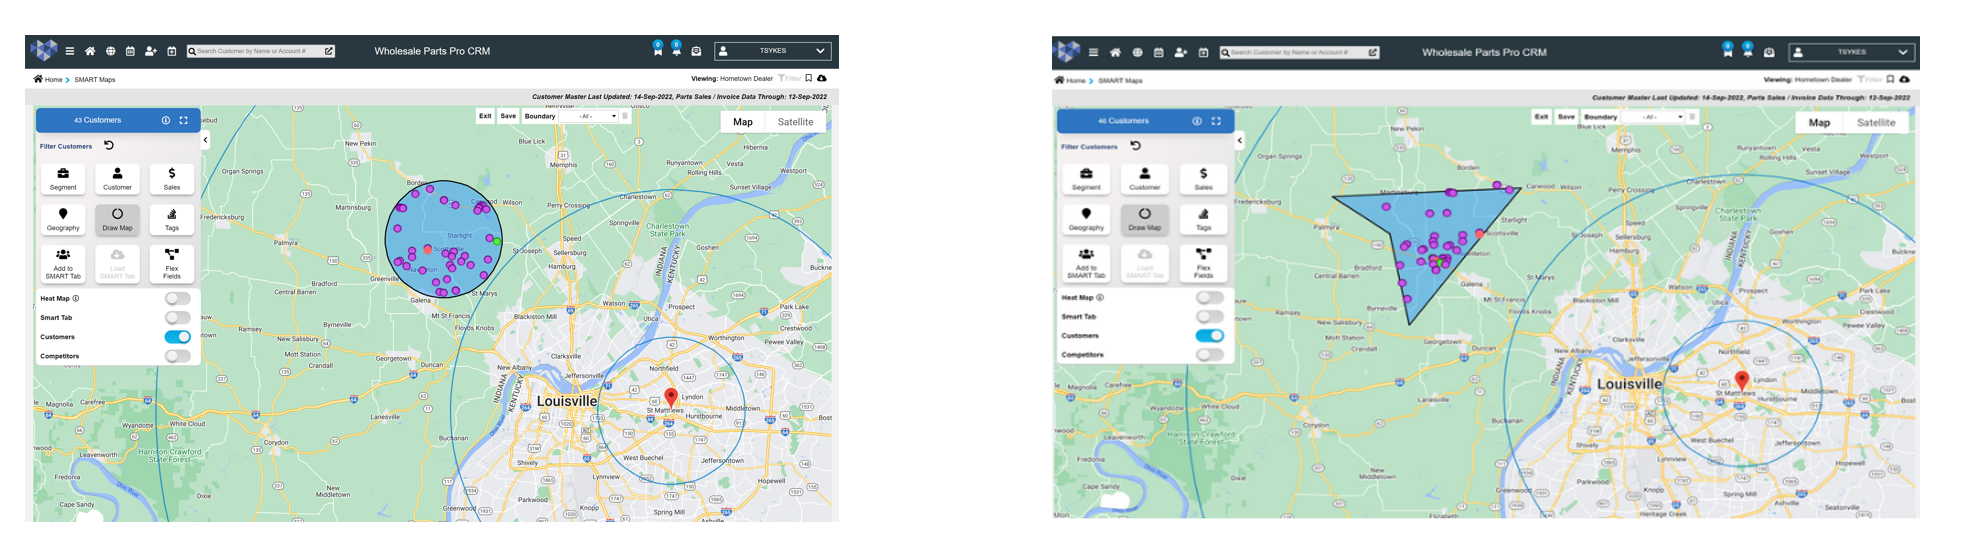
Once on the SMART Maps page, you will see a filter menu to the left of your screen. Select the “Draw Map” filter in order to preview the functions that are available when it comes to setting boundaries on your map. Once here, you will be able to either draw a circle or shape around the area of customers you would like to focus on. You can then save down this list of customers to use in the future.
SMART Tabs
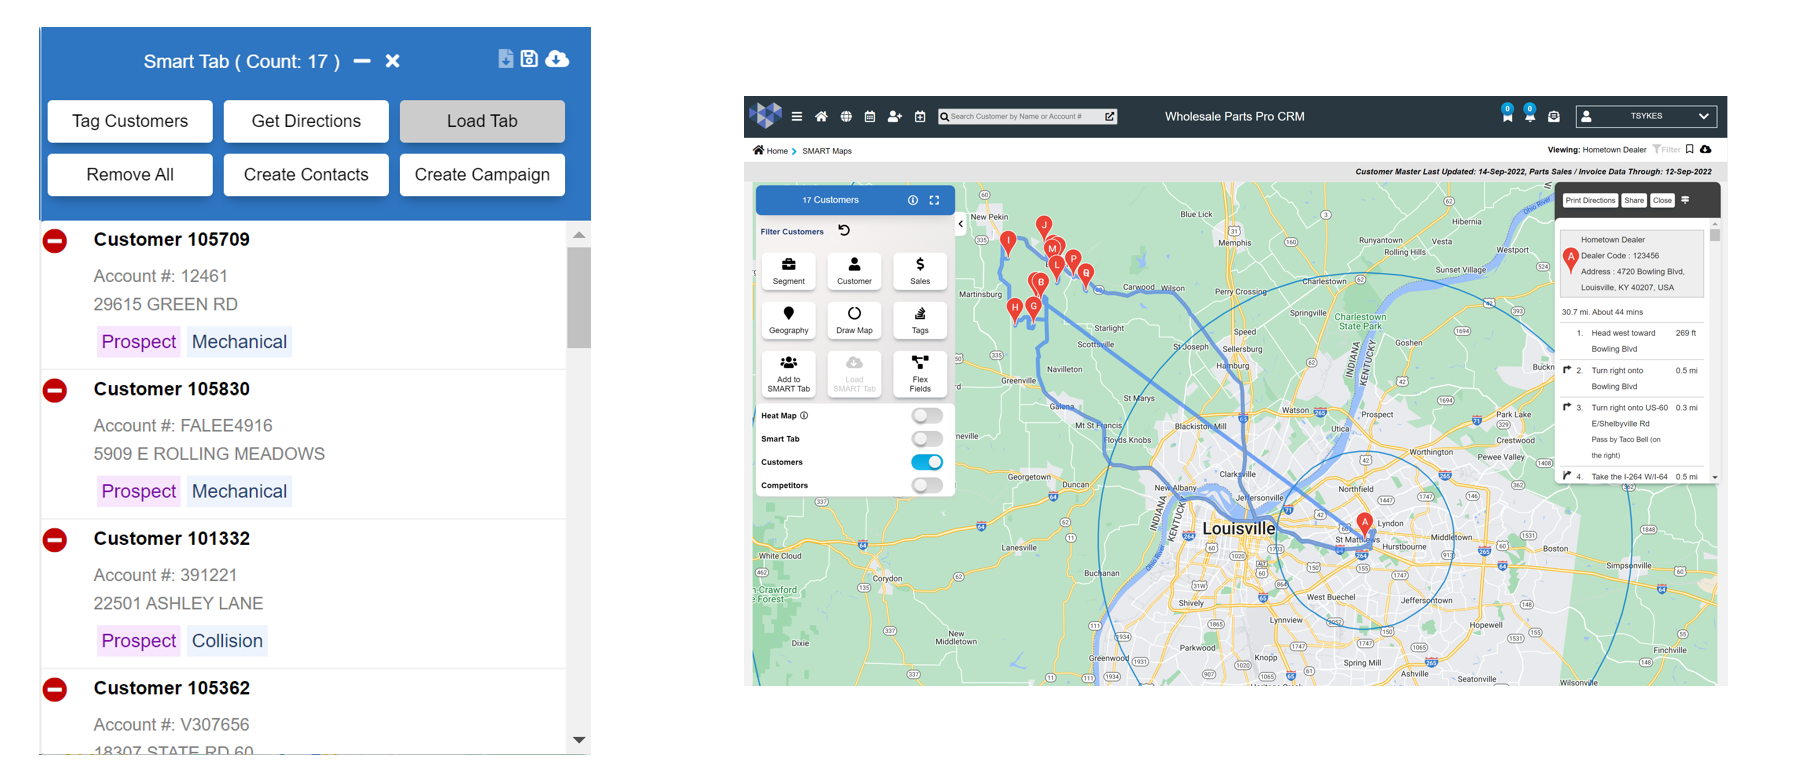
When selecting the “SMART Tab” filter, the customers you have singled out with the “Draw Map” tool will all be compiled into a a list on the right hand side of your screen. From here, you can tag these customers to a specific list name, get directions, create contacts or create a campaign.
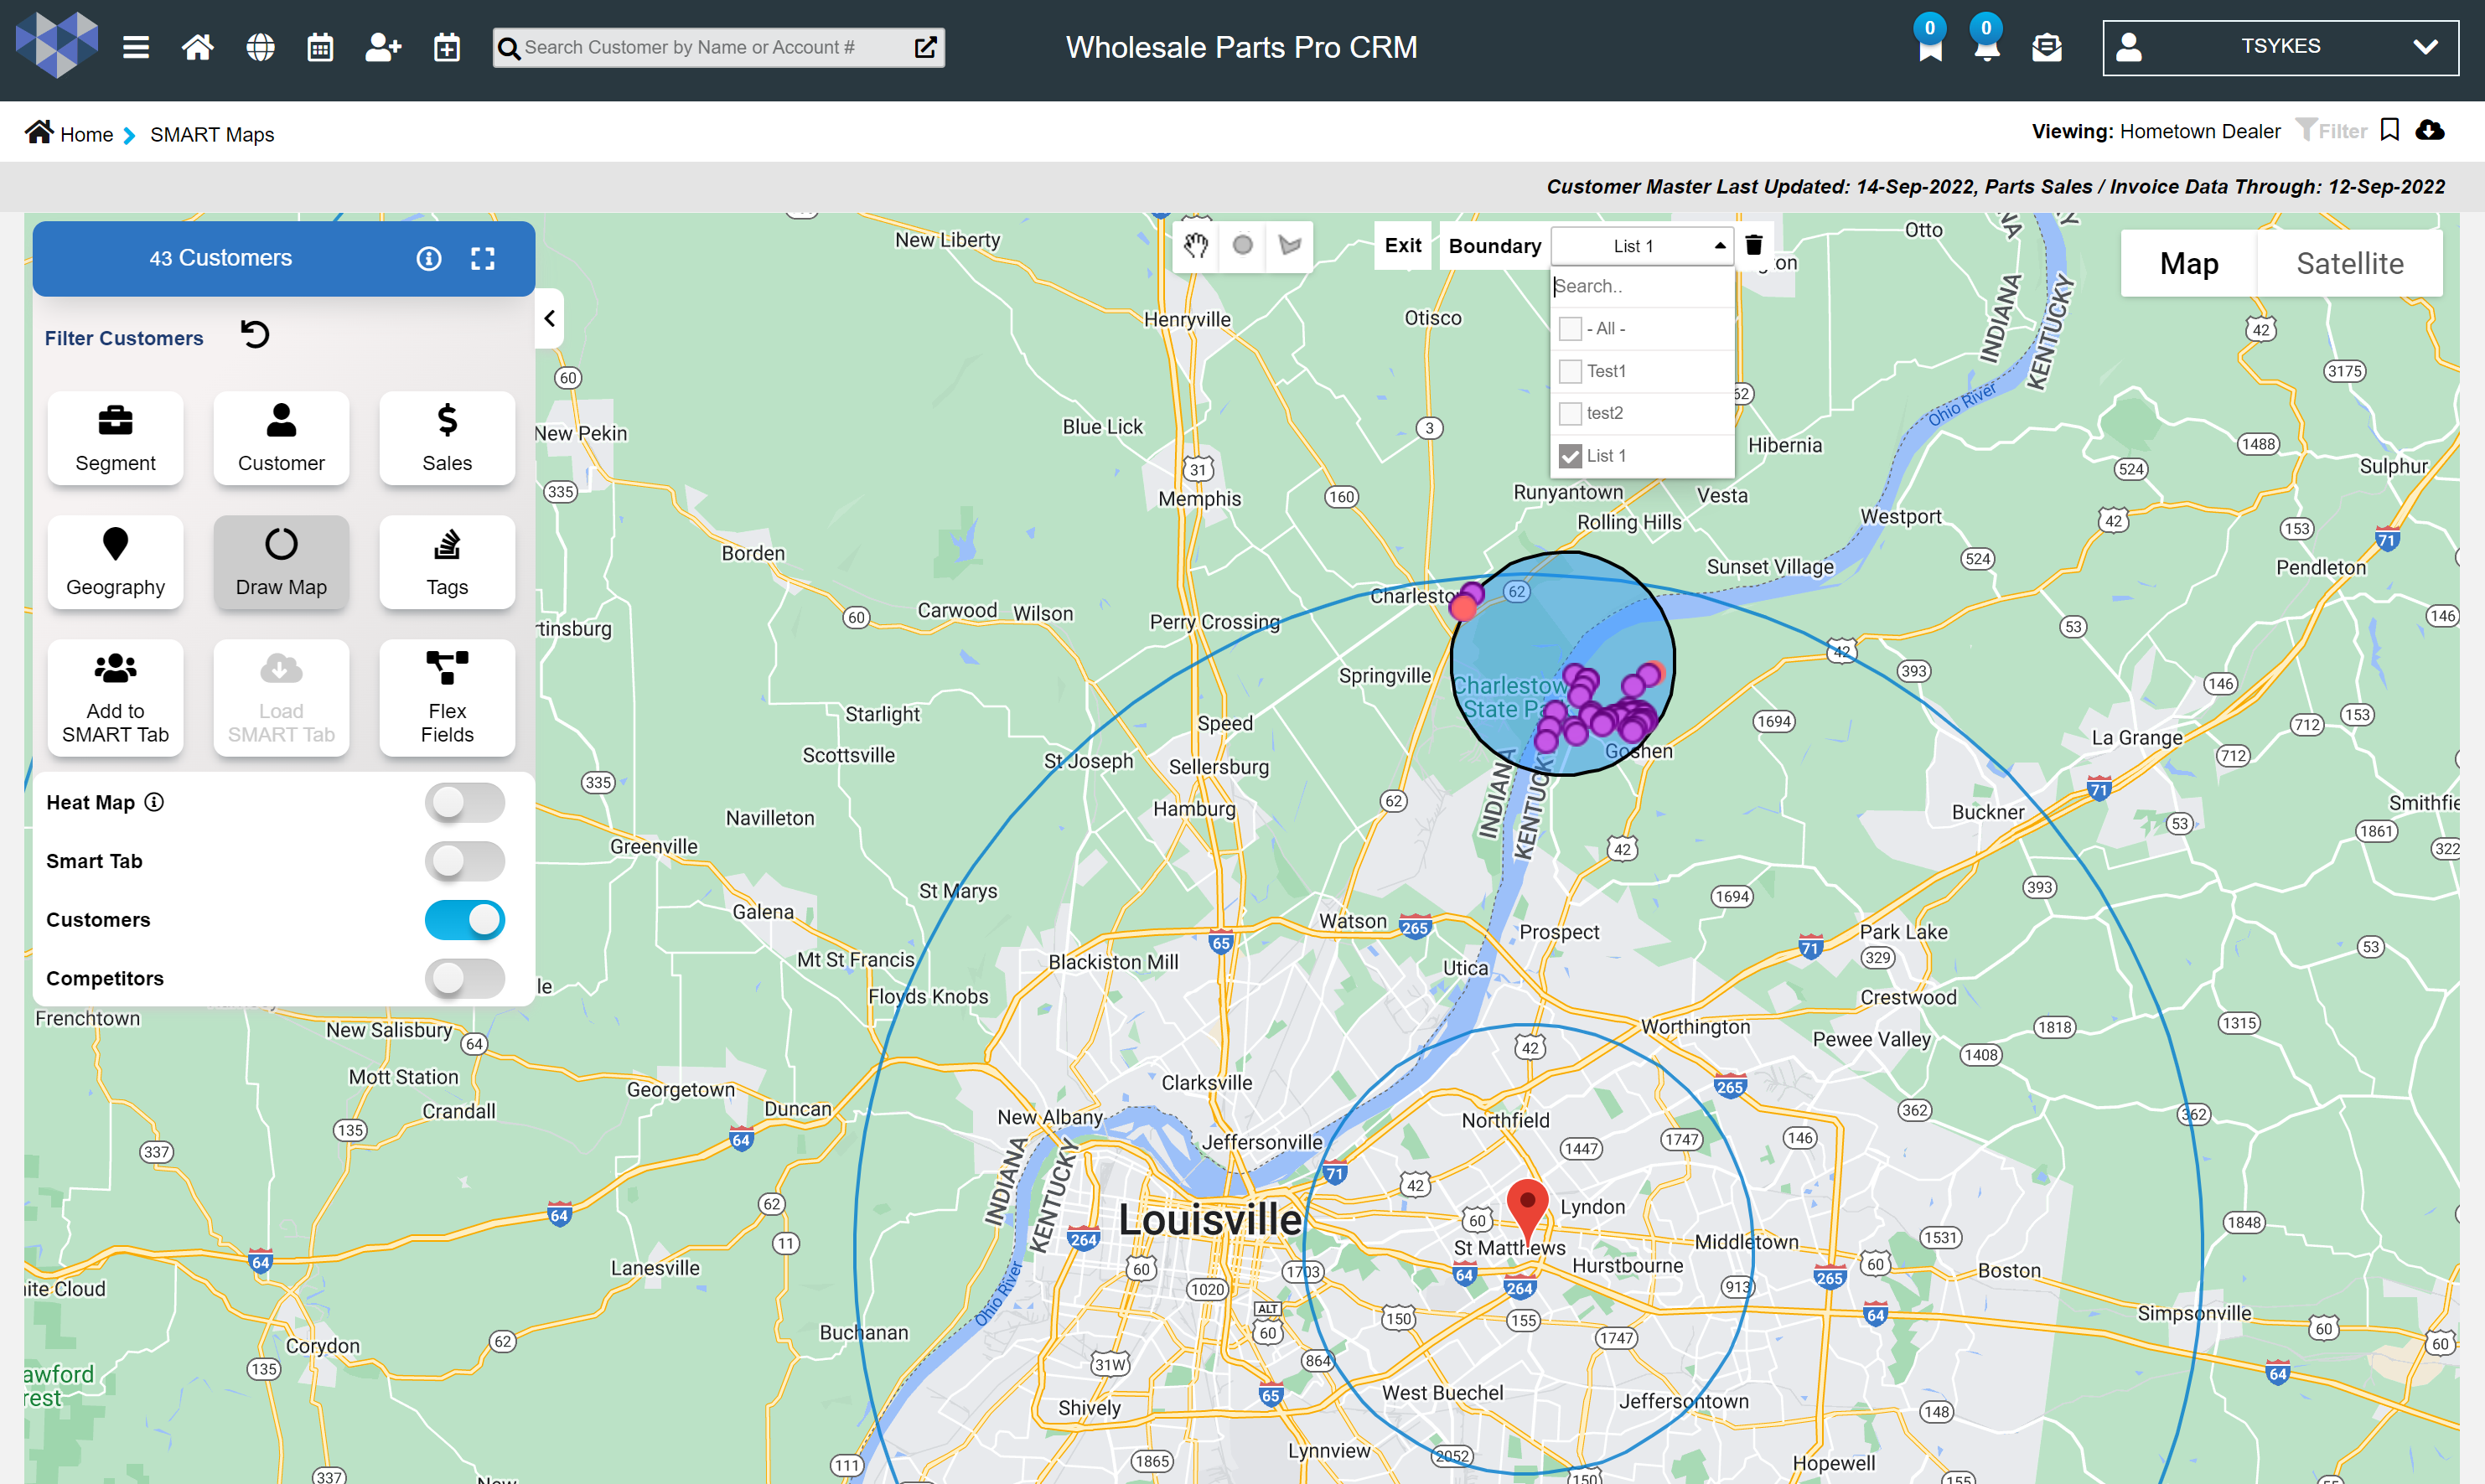
Boundary Drop Down
Within the “Draw Map” tool, you will notice a boundary drop down next to the exit feature. Any boundary that you create and save will show up in this drop down which will allow you to bring up that boundary of customers at any given time.
If you have any further questions and can’t find answers, please feel free to reach out to WPP@wholesalepartscrm.com